HRTEM quickstart#
This notebook demonstrates a basic HRTEM simulation of a double-walled carbon nanotube.
Configuration#
We start by (optionally) setting our configuration. See documentation for details.
abtem.config.set(
    {
        "device": "cpu",
        "fft": "fftw",
        "diagnostics.task_progress": False,
        "diagnostics.progress_bar": False,
    }
);
Atomic model#
In this section we create the atomic model. See our walkthough or our tutorial on atomic models.
We create two nanotubes with different radii using the nanotube function from ASE.
tube1 = ase.build.nanotube(10, 0, length=5)

tube2 = ase.build.nanotube(16, 0, length=5)

# combine the two nanotubes into a single structure
tubes = tube1 + tube2

# add vacuum in the x- and y-direction
tubes.center(vacuum=4.0, axis=(0, 1))

abtem.show_atoms(tubes, plane="xy", title="Beam view");
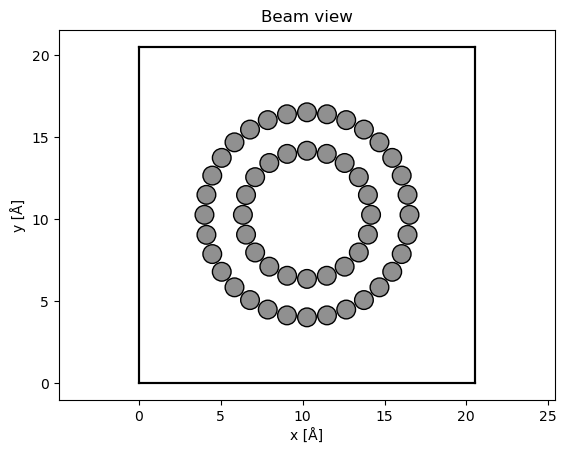
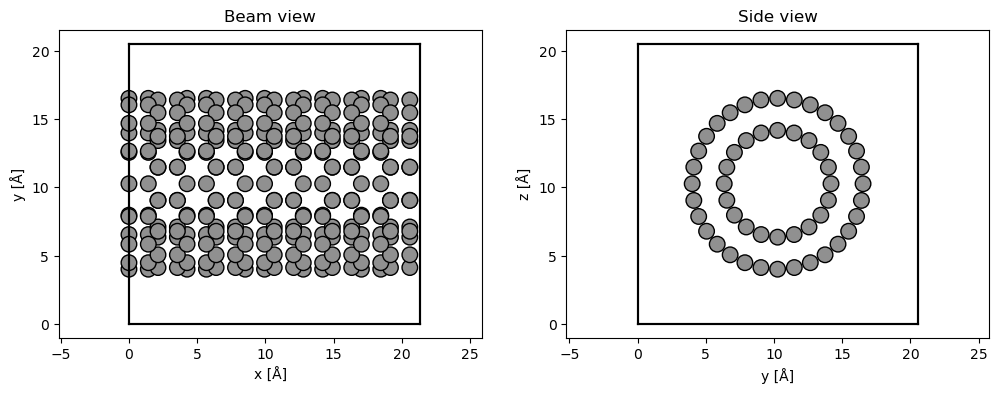
We rotate the nanotubes such the beam travels perpendicular to the length of the nanotubes.
rotated_tubes = tubes.copy()

# rotate cell and atoms by 90 degrees around y
rotated_tubes.rotate("y", 90, rotate_cell=True)

# standardize unit cell (done automatically in an abTEM simulation)
rotated_tubes = abtem.standardize_cell(rotated_tubes)

fig, (ax1, ax2) = plt.subplots(1, 2, figsize=(12, 4))
abtem.show_atoms(rotated_tubes, plane="xy", ax=ax1, title="Beam view")
abtem.show_atoms(rotated_tubes, plane="yz", ax=ax2, title="Side view");
Potential#
We create an ensemble of potentials using the frozen phonon model. See our walkthrough on frozen phonons.
frozen_phonons = abtem.FrozenPhonons(rotated_tubes, 32, sigmas=0.1)
We create a potential from the frozen phonons model, see walkthrough on potentials.
potential = abtem.Potential(
    frozen_phonons,
    sampling=0.05,
    projection="infinite",
    slice_thickness=1,
)
Wave function#
We create a plane wave function at an energy of 100 keV. See our walkthrough on wave functions.
wave = abtem.PlaneWave(energy=100e3)
Multislice#
We run the multislice algorithm to calculate the exit waves, see our walkthrough on multislice.
exit_wave = wave.multislice(potential)
exit_wave.compute();
Contrast transfer function#
We create a contrast transfer function of the objective lens, see our walkthrough on the contrast transfer function
Cs = -8e-6 * 1e10  # spherical aberration (-8 um)

ctf = abtem.CTF(Cs=Cs, energy=wave.energy, defocus="scherzer")

print(f"defocus = {ctf.defocus:.2f} Å")
defocus = -66.65 Å
ctf.semiangle_cutoff = ctf.crossover_angle
We include partial coherence in the quasi-coherent approximation. For more accurate descriptions of partial coherence, see our tutorial on partial coherence.
Cc = 1.0e-3 * 1e10  # chromatic aberration (1.2 mm)
energy_spread = 0.35  # standard deviation energy spread (0.35 eV)

focal_spread = Cc * energy_spread / exit_wave.energy

incoherent_ctf = ctf.copy()
incoherent_ctf.focal_spread = focal_spread
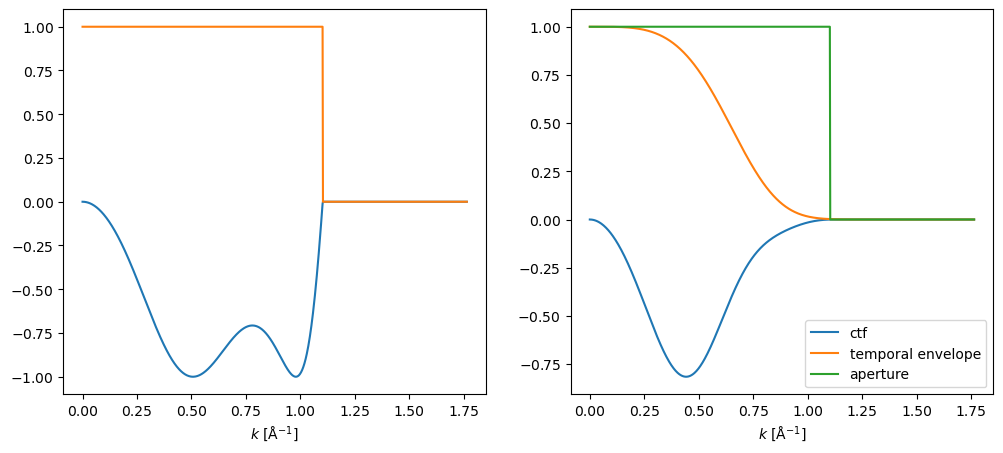
We show a profiles of the contrast transfer functions.
fig, (ax1, ax2) = plt.subplots(1, 2, figsize=(12, 5))
ctf.profiles().show(ax=ax1)
incoherent_ctf.profiles().show(ax=ax2, legend=True);
We apply the contrast transfer function, then calculate the intensities of the wave functions.
measurement_ensemble = exit_wave.apply_ctf(incoherent_ctf).intensity()

measurement_ensemble.shape
(32, 426, 411)
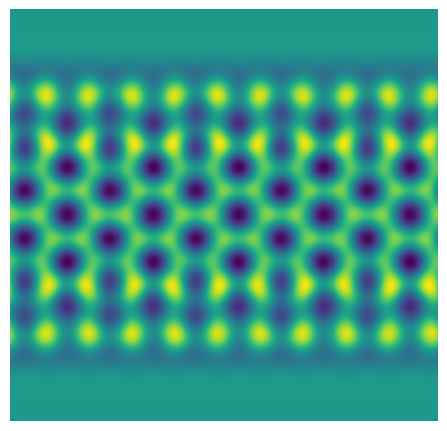
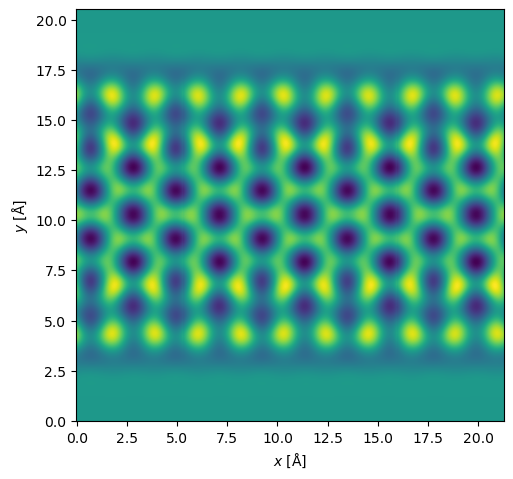
The result is an ensemble of images, one for each frozen phonon, we average the ensemble to obtain the final image.
measurement = measurement_ensemble.mean(0)

measurement.show();
Postprocessing#
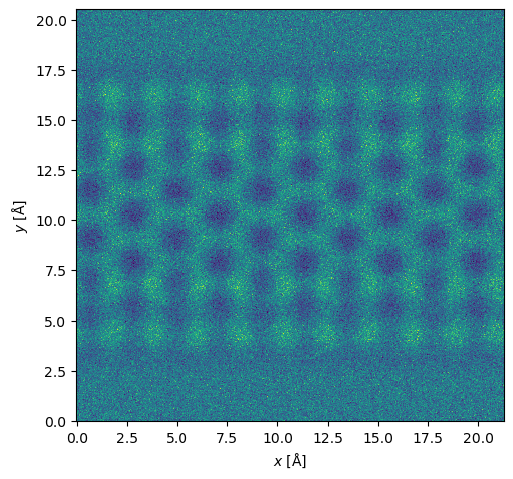
Many tasks requires additional post-processing steps. Below we apply Poisson noise to simulate the shot noise of a given finite electron dose.
noisy_measurement = measurement.poisson_noise(dose_per_area=1e4)

noisy_measurement.show()
<abtem.visualize.visualizations.Visualization at 0x1d5762650>
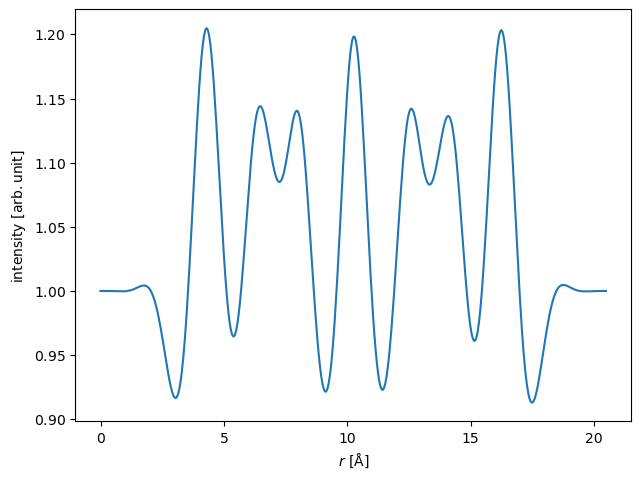
Showing the results as a line profile often provides a better sense of relative intensities.
start = (0, 0)
end = (0, potential.extent[1])

measurement.interpolate_line(start, end).show();